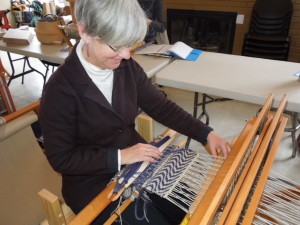
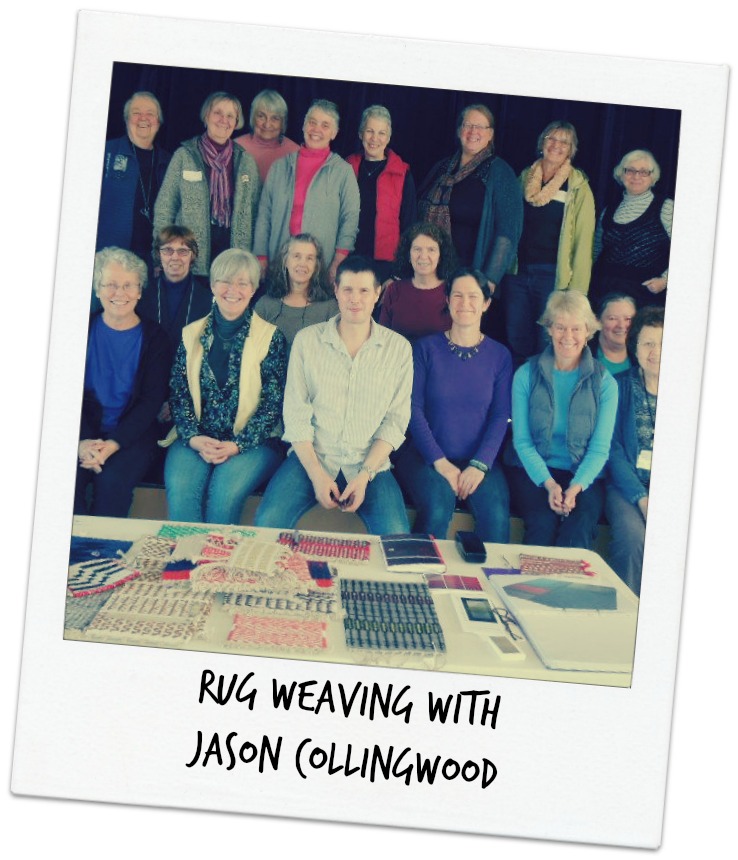
I recently took a great class on rug weaving. It was a 3 day class and involved carting floor looms across the Sound, early morning ferries, and afternoon traffic jams, but it gave back so much more. Our instructor, Jason Collingwood, was patient and honest – a good coach. My fellow classmates added inspiration to the mix.
This class centered on twill structures and ways to use these to make interesting designs for rugs. Jason is well-known for his rugs (look at some of his rugs here in his gallery) and his teaching. Many of us have his father’s book and have found it fairly impenetrable so, without knowing much more, I jumped at the chance to learn from a pro. (Now that I have taken the class and learned something of their approach, the book is more intelligible.)
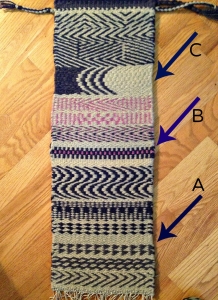
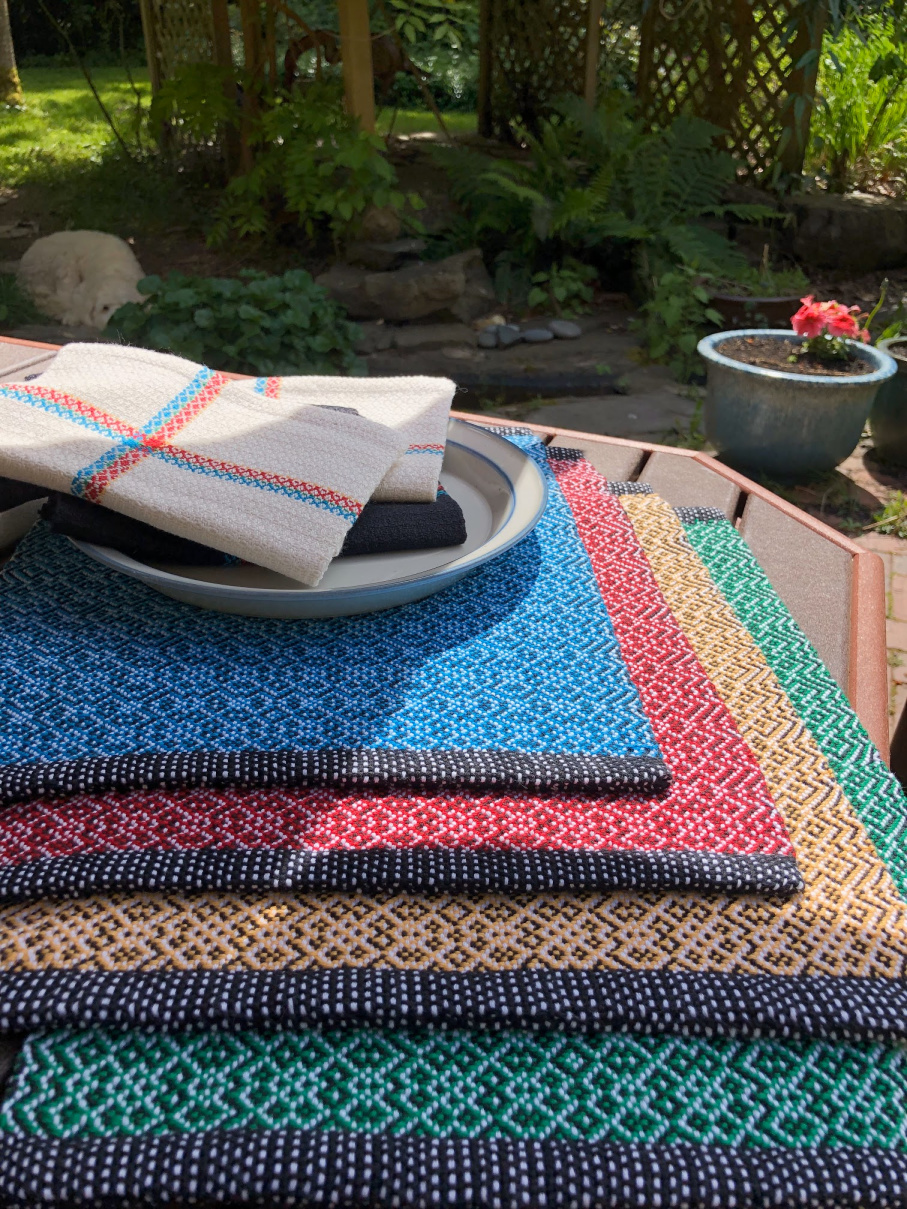
Day 1 (A above) focused on how to set up the loom for a rug, get started with a solid base, and manage the selvedges effectively. We also learned a lot about ways looms can be modified to ensure a quality product. Understanding the modifications gave me clues on how my personal loom would work and ideas for minor modifications if I chose to create a rug. Day 2 was focused on weaving twill on opposites (B above), and playing with ways to make it interesting. As you can see, I really liked the undulating twill. Then on Day 3 we learned how to increase the complexity of the design by crossing or clasping the weft as we wove. (see the section C where the design in the center changes)
After such an intense experience, I felt sure I could weave a moderately reasonable rug (ah, the confidence of a neophyte is truly amazing). I was really intrigued with ways to incorporate that undulating twill into an interesting design for a rug giving the sense of an ocean. With the warp I had remaining, I experimented. The results were mixed, but I took away some valuable keys to future (I hope) success.
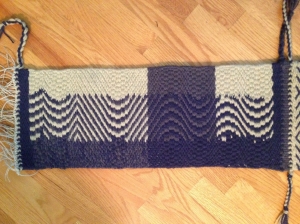
First, I need to mark not only the planned clasping points but the alternate points for the opposing sheds all along the warp. Since the warp is entirely covered, this doesn’t show but keeps me from making a fresh decision with every throw. Second, the pure undulating twill (see the darker section) is my preferred design for a larger piece (although I did toy with migrating it from one side of the sample to the other at the end). I also think a more subtle contrast (although not as subtle as the dark section) would look better. Last, this effort would be much more successful on my Fireside – which has a heavy beater and is solidly built. The Baby Wolf portable loom is not designed for this type of weaving.
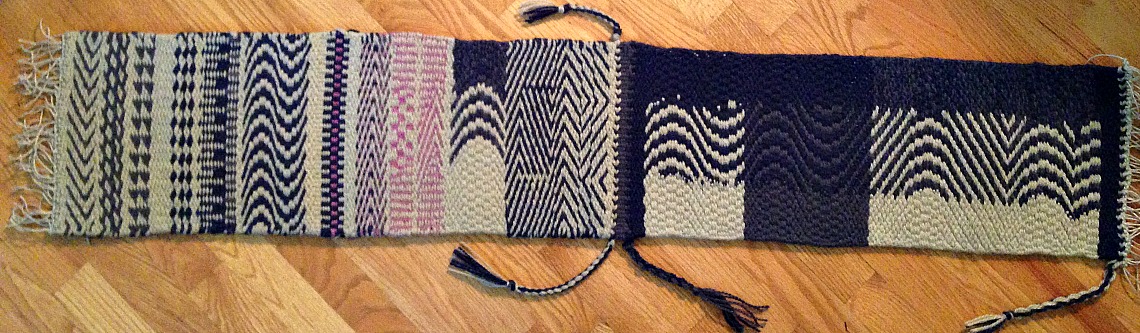
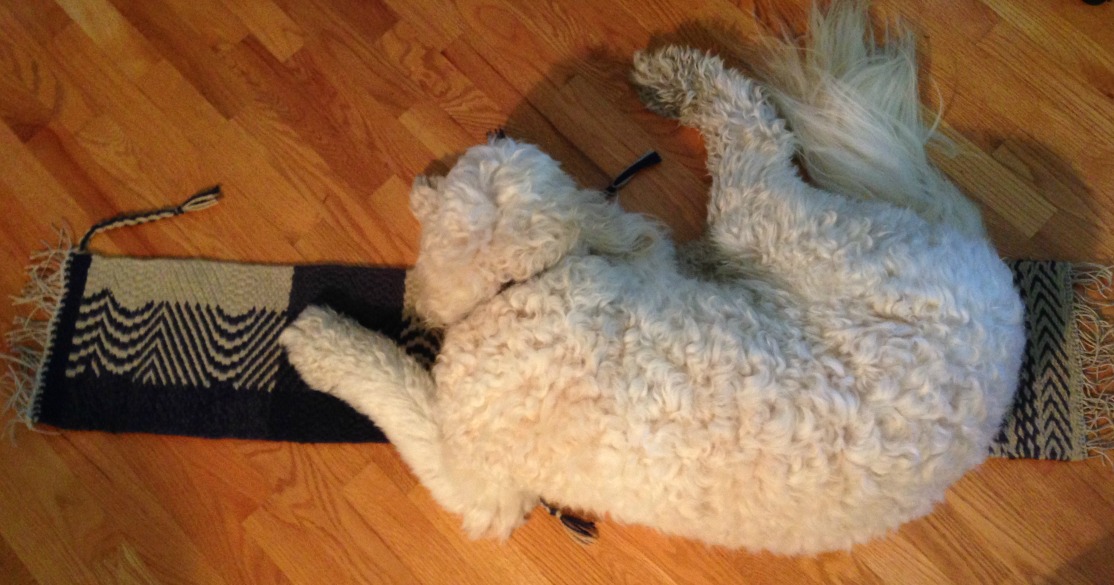
Once I was done experimenting, I cut my sample off the loom and spent a little time cleaning things up. Here is where the my focus on design techniques showed – my selvedges were not as clean as they should have been. And I never really figured out the knotting techniques for the warp ends – maybe next time? As I walked around the classroom, I saw a number of folks with nearly perfect selvedges and some great design skills. I am sure there were no two samplers alike and I took away a little something from each classmate. In the end, we all had a great time, learned a ton, and many of us genuinely think we might make a rug. Toby liked it too.

I was thinking braided rugs and then opened the email. Holy moly, talk about tricky designs and intricate weaving. Gorgeous stuff, as always.
Your work is lovely- as usual!!